Schedules
A schedule links playlists to screens over time. It defines when each playlist plays on the assigned screens.
One schedule can be assigned to multiple screens, but each screen uses only one schedule at a time.
Creating a Schedule
-
Go to the Schedules page.
-
Click New schedule.
-
Choose a recurrence mode (see below).
-
Click Add. The schedule appears in the Schedules out of use list.
-
Click the schedule to open its settings.
-
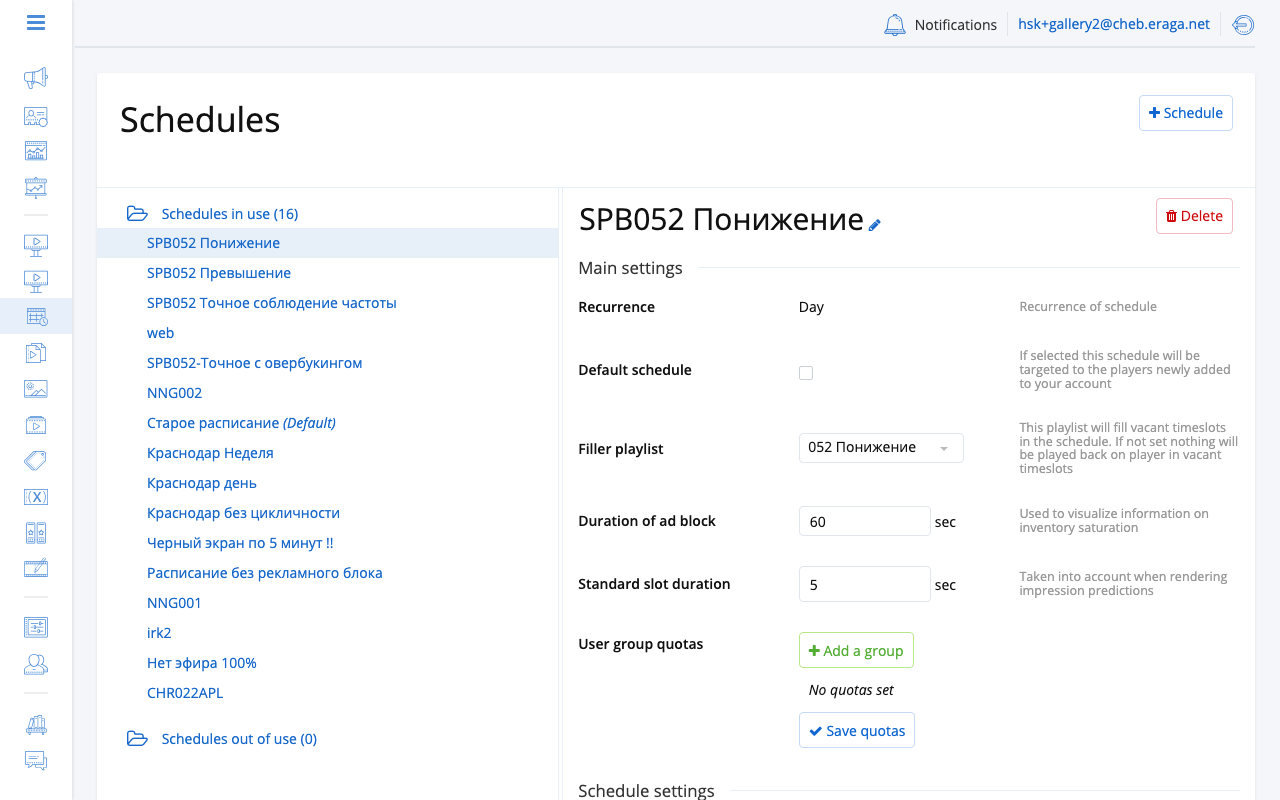
Give it a name and configure its parameters.
Recurrence Modes
The recurrence mode determines how playlists are arranged in time. You select it at creation and cannot change it later.
| Mode | Description |
|---|---|
No recurrence (Fixed dates) |
Assign playlists to specific date ranges on a calendar. Use this for one-time campaigns or promotions with defined start and end dates. |
Day |
A single 24-hour cyclogram that repeats every day. Playlists occupy time blocks within the day and the pattern loops daily. |
Week |
A 7-day cyclogram with different playlist arrangements per weekday. The pattern loops every week. |
Editing a Schedule (Cyclogram Editor)
For Day and Week schedules, click Edit schedule to open the cyclogram editor.
The editor displays a time grid:
-
Day mode — a single column representing 24 hours.
-
Week mode — seven columns (Monday through Sunday), each 24 hours tall.
To add playlists to the schedule:
-
Drag a playlist from the left panel onto the desired time block in the grid.
-
Resize the block by dragging its top or bottom edge to set the start and end time.
-
Repeat for additional playlists.
-
Click Save.
Time blocks snap to 30-minute increments. Playlists cannot overlap — the editor prevents you from placing a block on top of another.
Editing a Schedule (Fixed Dates)
For No recurrence schedules, the editor shows a calendar month view.
-
Drag a playlist from the panel onto the calendar.
-
In the date picker dialog, select the start and end dates for the playlist.
-
Click Save in the dialog to confirm.
-
Repeat for additional playlists.
-
Click Save at the top to save the schedule.
Use the month/year navigation to move between months. Playlist bars span across calendar days to show their active date range.
Main Settings
Default schedule
When enabled, the default schedule is automatically assigned to all new screens added to your account.
Filler playlist
A playlist that fills time slots not covered by any other playlist in the schedule. Typically used for self-promotional or placeholder content. If no filler playlist is set, screens display a black screen during empty time slots.
Duration of ad block
The length of the ad block in seconds. Used to visualize inventory saturation and as the base for screen group quotas.
Standard slot duration
The typical ad duration in seconds, taken into account when rendering impression predictions.
Screen group quotas
A quota sets how many seconds of the ad block the users of a screen group may book — for example, when two sales houses share the same screens, each working from its own group. A quota limits a group; it does not reserve airtime for it. Without quotas, airtime goes to whoever books it first.
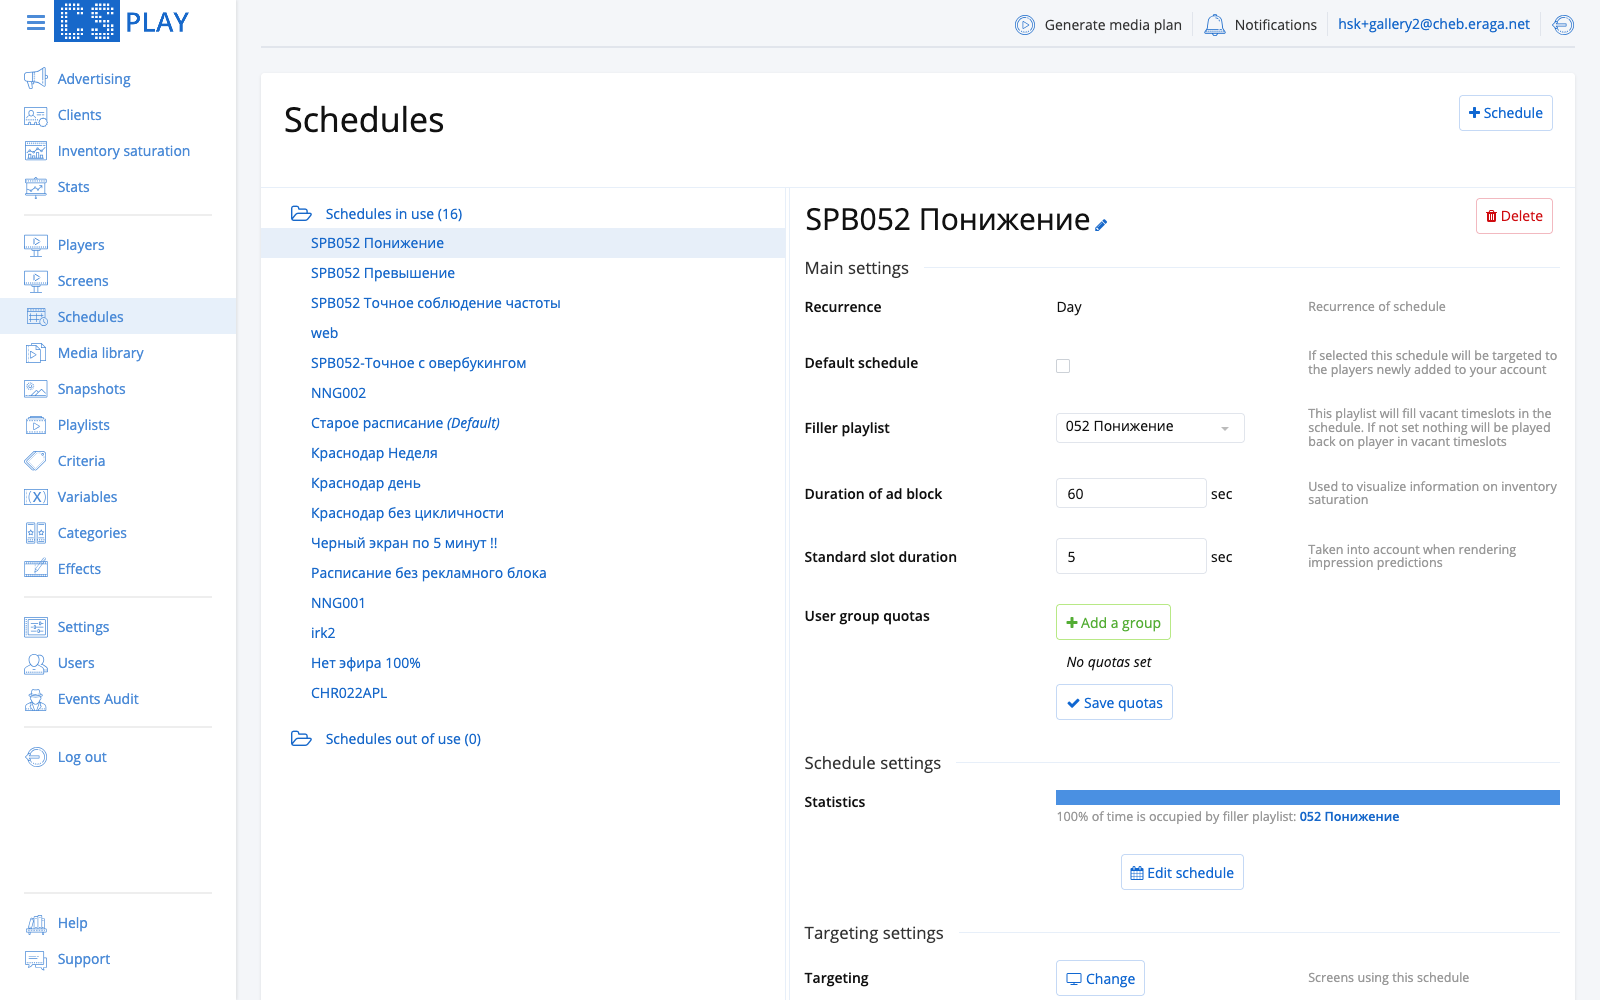
To add a quota:
-
In the User group quotas block, click Add a group.
-
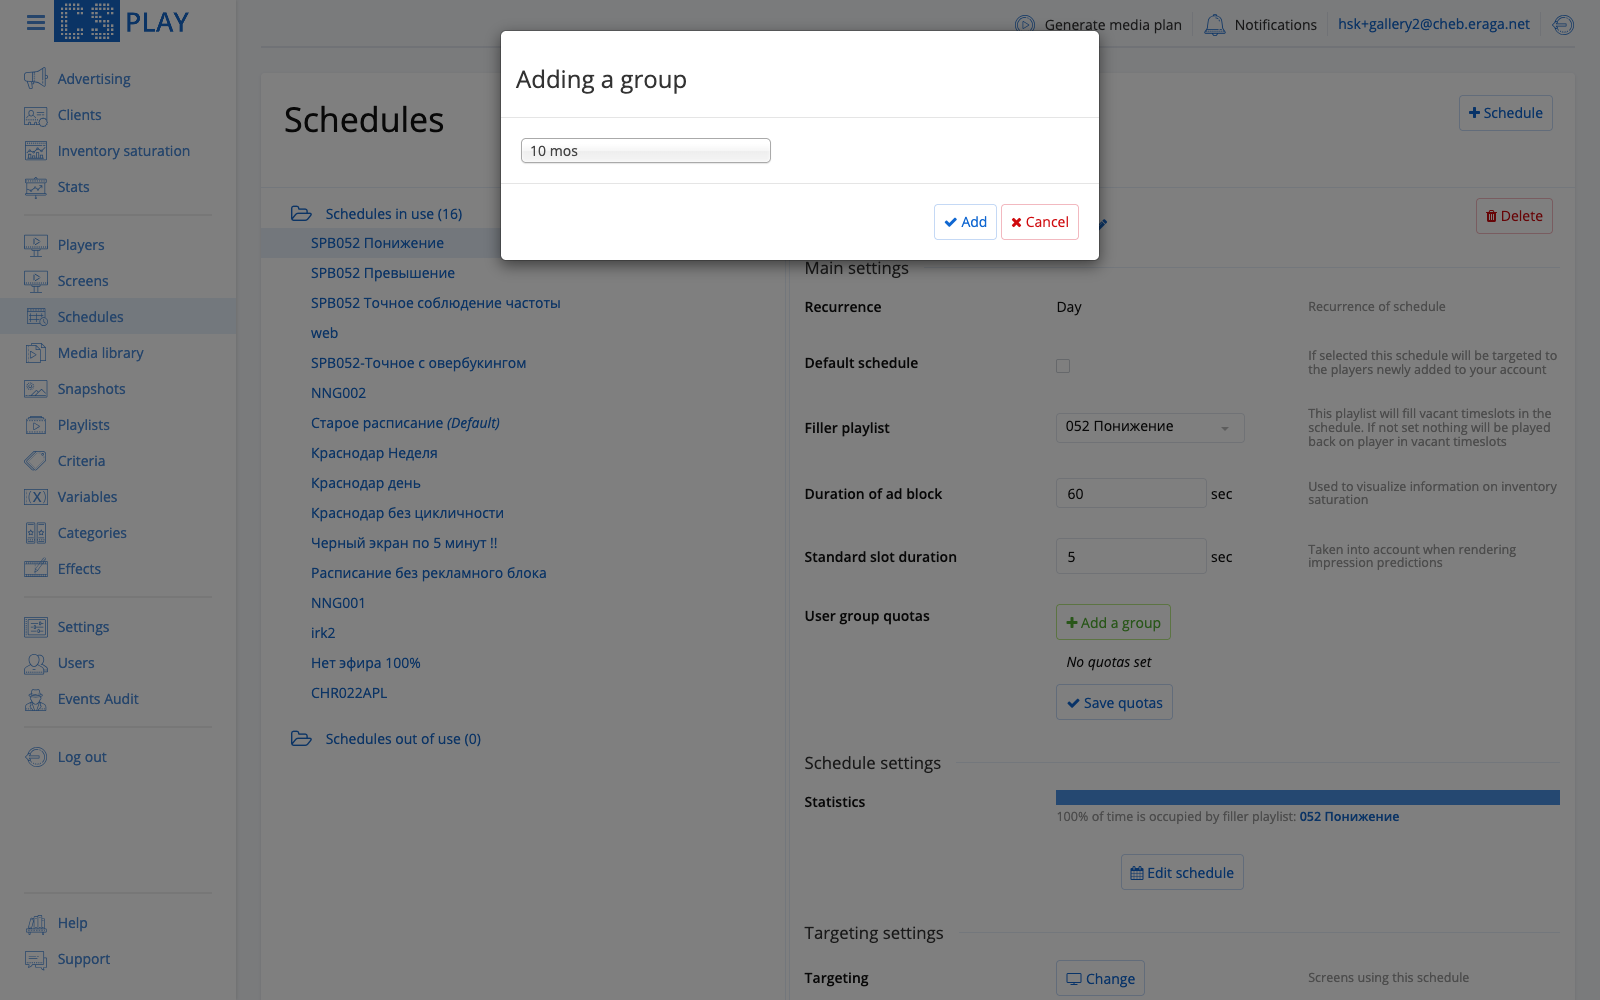
In the Adding a group dialog, select the screen group and click Add.
-
Enter the quota value and click Save quotas.
Quota rules:
-
The quota is set in seconds within the ad block.
-
It must be at least one standard slot long and no longer than the ad block, and all quotas of a schedule together must fit into the ad block.
-
It must be a multiple of the standard slot duration.
-
A quota belongs to a screen group and applies to the users restricted to that group. Users who belong to no group are never limited by a quota.
-
A quota is a limit, not a reservation. For the group’s users, the load of the ad block is measured against the quota instead of the whole block, and when their own group has a quota, an overbooking warning at activation cannot be overridden. Nothing is held for the group: users outside it can still book the whole block.
-
A group without its own quota inherits the quota of its nearest parent group that has one.
| Configuration | Behavior |
|---|---|
No quotas set |
First come, first served — any group can occupy any share of the block. |
Group A = 30 s |
For Group A’s users the load is measured against 30 seconds, half of the block. Nothing is reserved for Group A: all other users are unrestricted and may take any share of the block. |
Group A = 30 s, Group B = 30 s |
Each group’s users are measured against their own 30 seconds. Users who belong to no group are not limited, so they can still fill the whole block — neither group is guaranteed its 30 seconds. |